Logo Belt
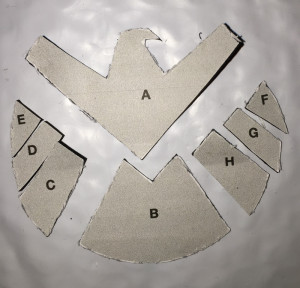
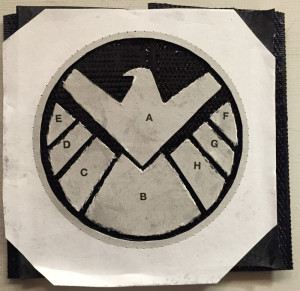
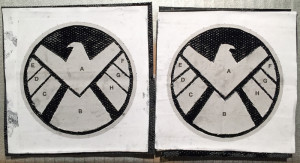
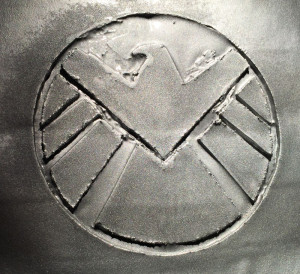
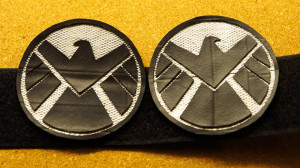
The second item I created was the logo belt buckle (reference photos). I hadn’t really made a firm decision to make a whole costume at that point and I was just wanted something simple to build to have something to show and talk about at the presentation I was preparing. I tried different materials I happened to have at home and ended up making the buckle entirely out of vinyl flooring. It’s pretty easy to cut with sharp knife, spray-paints very easily and it was soft and thin enough so that I could use my sewing machine to attach the lowest layer of the buckle to the belt. The belt is 5 cm (2″) wide elastic from a local crafts shop with velcro sewn for closing it. In the film, the belt is made of the same material as the jumpsuit. With a bit more effort, the belt could be made to look a lot more “professional”.
The buckle just covers the velcro and doesn’t open up. It would be interesting to try to design a functional buckle with this design – maybe some day. The silver base of the buckle consists of layers of vinyl, initially attached with double sided carpet tape and secured later on with a bit of epoxy glue at the corners. The red and black parts are individual pieces cut from a single layer of vinyl. I spent quite a bit of time getting the tapers on the red part as clean as possible. I had silver and red spray paint already and used a wide black permanent marker to paint the small center part black.
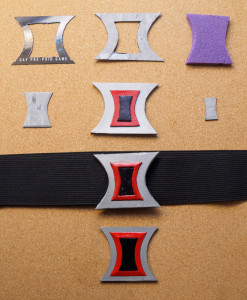
Everything from early draft versions to the hand-crafted belt to the 3D-modeled and printed version.
Parts:
- 5 cm / 2″ wide knit elastic band
- 5 cm / 2″ wide velcro (note that you can get elastic loop side velcro in this size)
- Left-over vinyl flooring from a dumpster
- Double-sided carpet tape (optional)
- Epoxy glue
- Silver, red and black paint
The belt buckle is a nice confidence-builder: it’s an important part of the costume, but it’s also quite easy to make one that looks practically identical to the one in the film. If you happen to have the needed materials and some simple tools (mostly just a marker pen and a sharp knife), you can potentially make the belt buckle in one evening (just give the paint a chance to dry properly and apply multiple coats if necessary).
There are a number of 3D models for this buckle on Thingiverse. Most of them are not very accurate, but one is pretty close. My buckle was the first thing I made, so looking at it now and comparing it with photos from the film, I could see where it could be improved.
One evening in January, I used Blender to model a more accurate belt buckle and then a few days later printed it at the public library. Here’s a zip archive with the Blender file and STL exports. I used a lot of constructive solid geometry for this model, which means that I took basic shapes like boxes and cylinders and used “addition” and “subtraction” to describe the 3D model. CSG sometimes causes problems in the mesh exports, but those can be (and were) cleaned up using NetFabb Free. The hourglass cut-outs all use the same size cylinder, except the one for the red part is skewed. The geometry is also mirrored on two axes. Printing the looped version of the silver colored part will probably require adding some removable support material. I enabled that option in Cura and it was pretty easy to fut off the excess with a sharp knife.
The buckle is modeled as three different parts that still need to be glued together. I did this so that the two flat outward faces could be printed against the glass bottom of the printer and the beveled red part with the bevel up. Flat surfaces printed right on the glass look a lot better than flat surfaces printed at the top of the model. If you print this, make sure the parts are oriented with the largest flat surfaces down on the printer floor.
The timeglass buckle is a relatively quick and easy item to print and the first version didn’t have loops for the belt to pass through, so I changed the design slightly and printed another. The one in the photo above is the first version without the belt loops. I had some difficulties with the red paint – my can of red paint is probably already past its prime. The second print was made using red filament and just I deepened the red color a bit by coloring with a permanent marker.
Boots
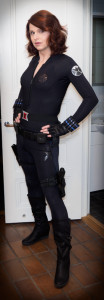
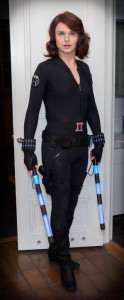
I compromised quite a bit on the boots. I found inexpensive wedge heel boots with just one strap and the zipper on the side instead of in the front. I figured I could add some straps for show later on, if I had time. As often happens, I just didn’t have time to improve the boots at all before Halloween. They were very comfortable and easy to move in, but something a bit sleeker around the legs and with more straps would have been more accurate. As far as I know, the boots that were used in the film were custom-made, so they are not available anywhere.
In December, I found and bought some boots that are closer to the right length, with a higher wedge heel and about the right length too. Closer, but of course not perfect. The first pair of boots have a seam running along the front, so I’m also considering having them modified to be as accurate as possible. Having found a replacement, trying to modify the previous the boots wouldn’t risk the outfit. I think I would need to talk to a shoemaker: my sewing machine isn’t suitable for this task and I don’t think I want to try hand-sewing a zipper onto the boots. Alternatively, I could leave out the front zipper and just change the straps on the new boots to look more like the Avengers boots.
Gloves
The gloves I used are men’s weightlifting gloves: Harbinger 143 Pro. Inexpensive and with quite a bit of leather, they are not a perfect match, but a very good one for the price. The logo is fairly inconspicuous, so I just left it there. In the completed costume, there’s a hidden micro-switch inside the palm of the glove to control the computer on the Widow’s Bite bracers. Other than adding a velcro patch inside the glove to attach the switch, I didn’t modify the gloves in any way. The switch part of the Widow’s Bites, so I’ll describe it in a later article in this series.
Up Next…
The next article will cover the tactical belt and gun holsters, which were also mostly off-the-shelf items that I only adapted slightly for use with the costume. After that though, this series should get more interesting with more parts that were built pretty much from scratch.
